Today I’m going to share my experience with writing React components that collect user input, handle image uploading, and communicate with API to load or persist data.
To persist the state of input fields you could write your custom components, but there’s no reason to do so, as there are several npm packages that exist that do it all for you, and have decent documentation & support available. I’ll list just a few options: redux-forms, react-redux-form, formsy-react.
My package of choice is react-redux-form. Its documentation turned out to be easily understood, and the package itself has all the features you may need to use with your forms. Though redux-forms has more stars on GitHub and it seems to be a good choice as well, I wish it had better documentation and code samples for main use cases.
Alright, so let’s start by creating a form reducer for the Redux store:
import { combineReducers } from 'redux'
import { combineForms } from 'react-redux-form'

export default combineReducers({
    forms: combineForms({
        myForm: {},
    }, 'forms', { key: 'f' })
})
Here we use the combineForms() function that allows us to have multiple forms. If you don’t need more than one form, however, you may consider using formReducer() instead.
Then we’re getting back to our component and creating a form:
import React, { PropTypes } from 'react'
import { connect } from 'react-redux'
import { Control, Form, Errors } from 'react-redux-form'
import { isEmpty } from 'validator'

export class MyForm extends React.Component {

  static propTypes = {
    myForm: PropType.object.isRequired,
    submit: PropType.func.isRequired
  }

  handleSubmit(user) {
    this.props.submit(user)
  }

  render() {
    let { myForm } = this.props
    return (
      <Form model="forms.myForm"
            onSubmit={(formModel) => this.handleSubmit(formModel)}>

        <label>First name</label>
        <Control.text model=".firstName" placeholder="Enter first name"
                      validators={{
                        required: (val) => val && !isEmpty(val)
                      }} />

        <Errors model=".firstName"
                show="touched"
                messages={{
                  required: "This field is required"
                }} />

        <label>Last name</label>
        <Control.text model=".lastName" placeholder="Enter last name"
                      validators={{
                        required: (val) => val && !isEmpty(val)
                      }} />

        <Errors model=".lastName"
                show="touched"
                messages={{
                  required: "This field is required"

                }} />

        <label>Gender</label>
        <Control.select model=".gender"
                      validators={{
                        required: (val) => val && !isEmpty(val)
                      }}>
          <option value="0">male</option>
          <option value="1">female</option>
        </Control.select>

        <Errors model=".gender"
                show="touched"
                messages={{
                  required: "This field is required"
                }} />

        <label>Avatar</label>
        <Control.file model=".avatar"
                      validators={{}} />

        <Errors model=".avatar"
                show="touched"
                messages={{}} />

        <button type="submit" disabled={myForm.$form.pending}>
          { myForm.$form.pending ? 'Loading' : 'Sign Up' }
        </button>
      </Form>)
  }
}
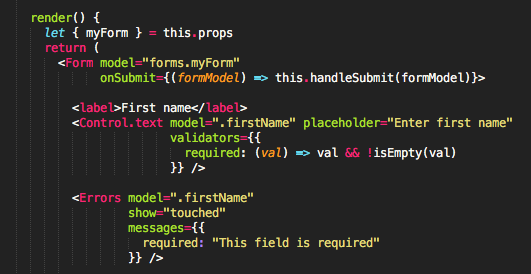
Here we’ve created a simple form with name, gender, and avatar fields. It also validates required inputs and shows validation messages below.
The component accepts two props: myForm, which is an object that holds our form’s state (I’ll explain what that means below), and submit – a function that handles form submission.
Next, we’ll create a container that will pass the required props to the component:
import { connect } from 'react-redux'
import MyFrom from './MyForm'
import { userSignup } from './actions'

const mapStateToProps = (state) => ({
  myForm: state.forms.f.myForm
})

const mapDispatchToProps = (dispatch) => ({
  submit: (user) => dispatch(userSignup(user))
})

export default connect(
  mapStateToProps,
  mapDispatchToProps
)(MyForm)
Here, myForm refers to the state of our form, which includes all low-level details such as the validity of each field, the general state of the form (pending/submitted), and so on. Check out myForm object to see all contained data.
The last step is creating an action that makes an API call, sets validation errors from the backend, if there are any, or marks the form as submitted otherwise.
import request from 'superagent'
import { actions as formActions } from 'react-redux-form'

export const userSignup = (user) => {
  const signupRequest = request.post('/api/v1/user/', user)
    .then(response => true, (err, res) => {
      if (err.response && err.response.body) {
        return Promise.reject(err.response.body)
      }
    })

  return formActions.submitFields('forms.myForm', signupRequest)
}
formActions.submitFields dispatches an action that will update the form status, and set validity. Note, that to have validation messages set correctly, in case of failure, the response from /api/v1/user should be in the following format:
{
  "firstName": [
    "First name can be 50 characters long maximum",
    "First letter has to be capital"
  ],
  "avatar": ["Maximum allowed image size is 1Mb"]
}
Where each key in the object corresponds with a key from the form model.
Now we know how to build simple, yet customizable forms that validate user input, store fields data in redux store, can transmit data to a backend, and handle backend responses to display additional error messages.
